Ferrari 250 GTO - Applying the N.A.R.T Decals
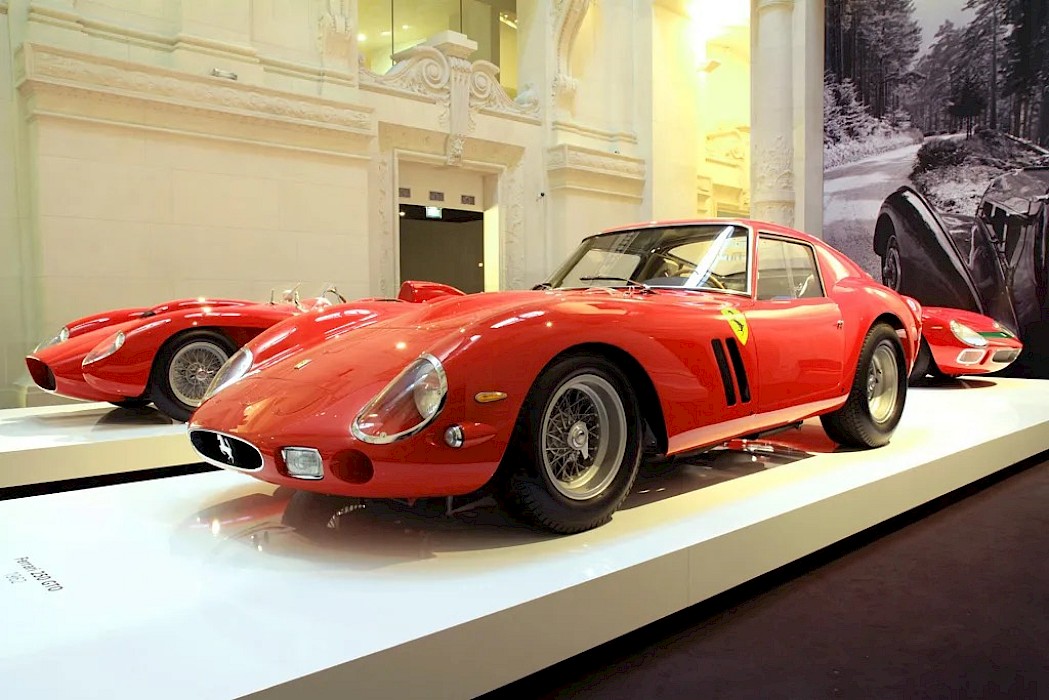
1962 - Street version
In the final Pack of our 1:8 scale model is a set of numbered decals and replacement license plate sticker which replicate the livery used by Pedro and Ricardo Rodriguez when they won the 1,000 km of Paris in 1962. This gives you the option to leave your finished model as the beautiful 'street' version, like the one currently owned by Ralph Lauren (the very same car we scanned to produce our 1:8 model), or to adapt it with the livery that this car used in 1962 when it won the prestigious French race.
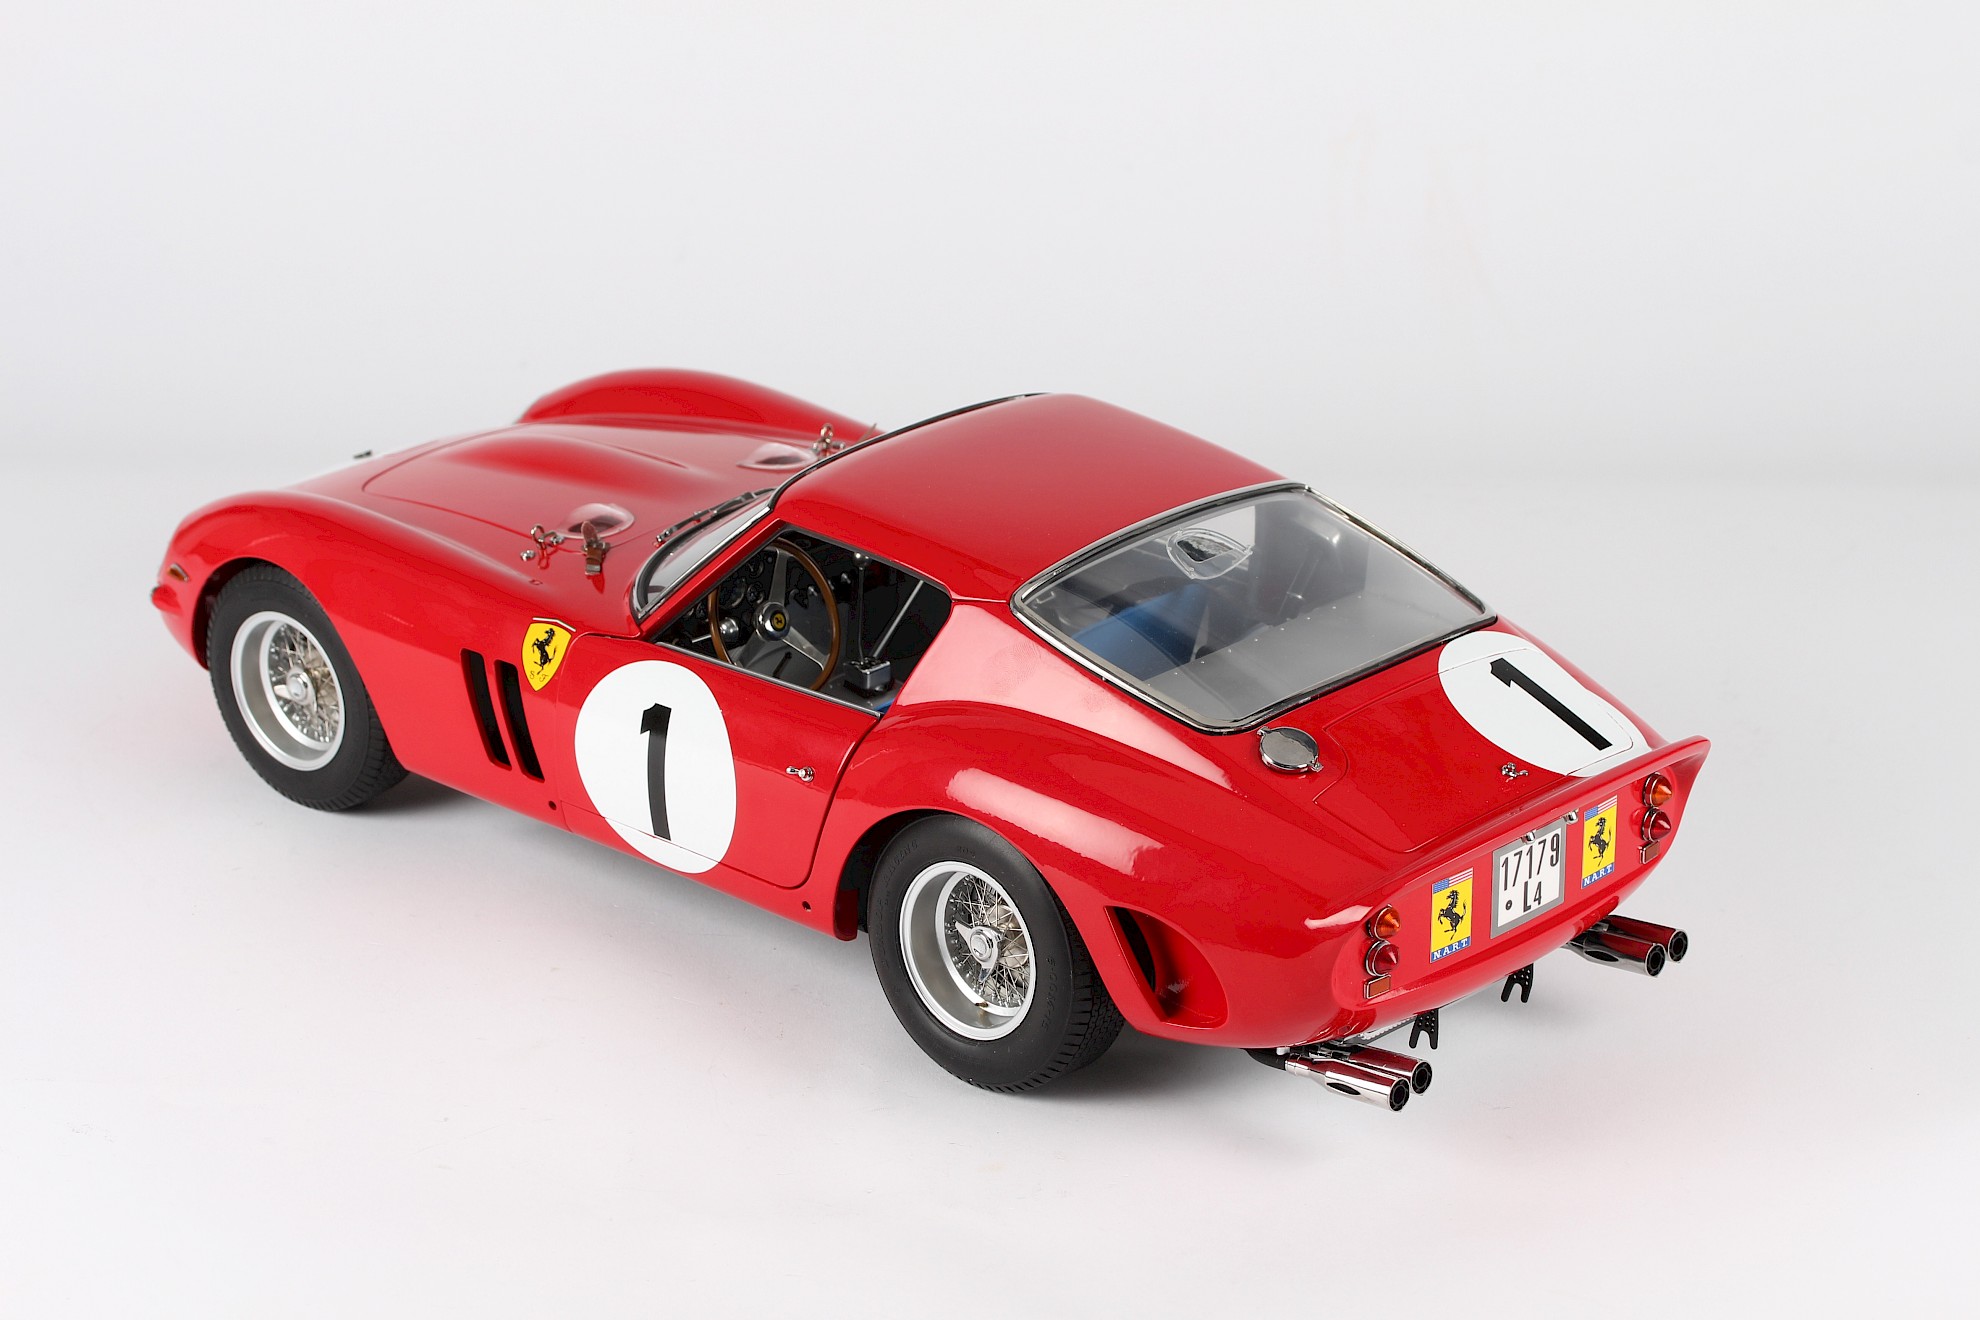
1962 - Race version
The 1962 1,000 km of Paris race boasted a grid filled with legendary names and formidable teams. From Ferrari to Porsche, the world's premier racing outfits converged on Montlhéry, bringing with them cutting-edge technology and top-tier drivers. The race was not just a battle of speed but a clash of titans, each vying for supremacy on the challenging circuit.
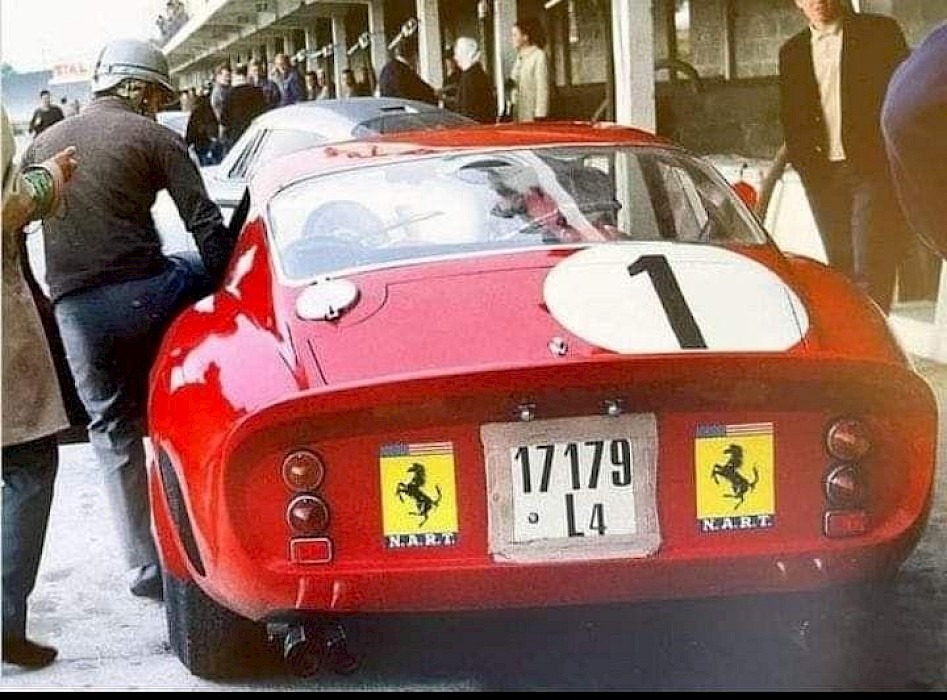
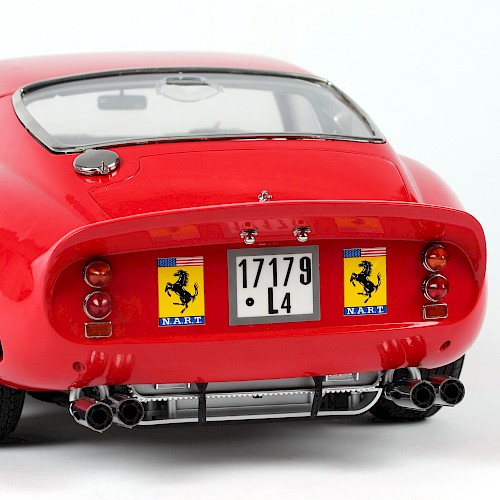
As well as sporting a bold Numer 1 on a white background, two yellow Ferrari/N.A.R.T badges were added to the rear of the car. The replacement license plate was simply stuck on with tape for the race!
Read more about the Rodriguez brothers and the race in our article here.
Applying the Decals
The first thing to say is that applying these decals was a lot easier than expected! They are large, and are of a thickness that replicates the look and feel of the real numbers which were temporary applications for the race.
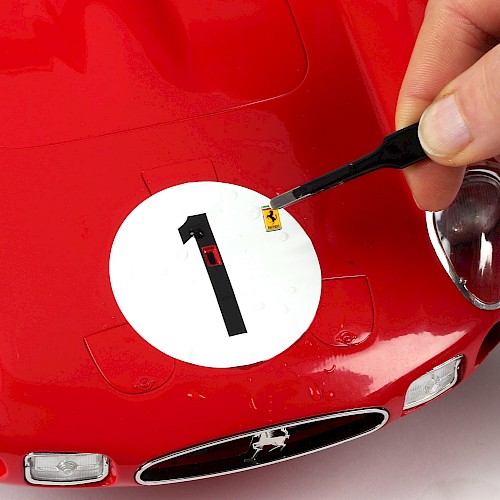
A top tip for applying the decals is to first paint a few drops of water onto the car's body surface where the decal is going to go. This will give a film of water between the bodywork and the decal providing plenty of time to move the decal around and micro-position it into its final placement. Here are some more specific tips following quite a lot of time searching for original images on the internet:
- The decal on the front has a small rectangle cut into it to allow the Ferrari badge to show through. I removed the badge first and then placed the decal, replacing the Ferrari badge after the decal was in its correct position and dry.
- Looking at the original historical photos, it seems that the top of the number '1' on the door aligns with the bottom triangle of window and is quite close to the door frame. The top of the white circle is very close to the chrome window trim.
- The top of the number 1 at the rear, on the boot, nearly touches the chrome window trim and starts to curve around the body on the right side of the car.
- The two N.A.R.T badges on the rear are not quite central between the lights and the license plate. You can see on the historical photos that they are marginally closer to the license plate.
Applying the License Plate Sticker
Swapping over the existing license plate is simply a matter of levering it out with some tweezers and then applying the sticker over the holes in the bodywork. According to historical photos the original plate has been removed and a temporary one stuck on with tape for the duration of the race. Maybe I will add some extra tape around it to give the effect of real tape.


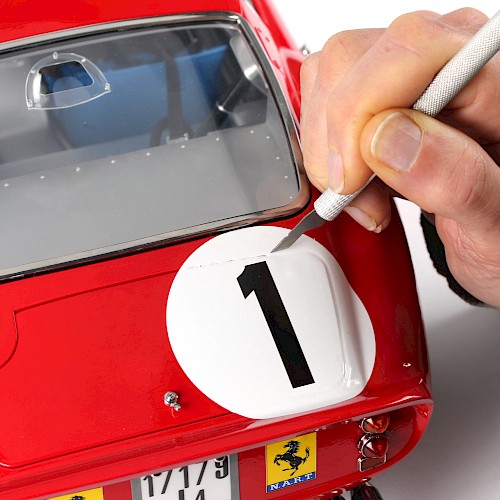
Cutting the Decals
As the decals cover the opening edge of the doors, boot and bonnet they need to be cut along the edges. To do this I used a very sharp, new blade on a scalpel. Rather than using a sawing action, I slowly and gradually pushed the knife in, cutting in one direction, then withdrawing the blade without cutting and slowly worked my way around. This prevents tearing the decal.
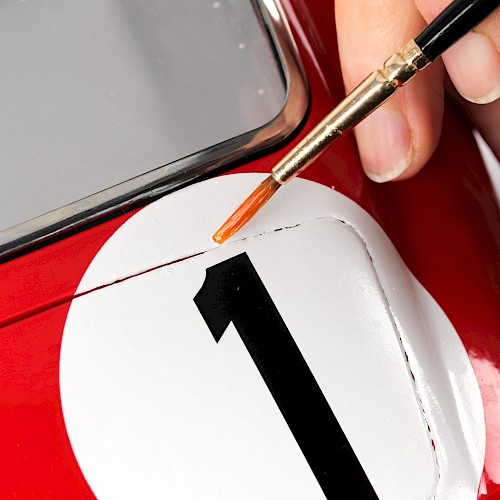
Once cut you will find that the edges of the decals are not attached to anything, so I used a brush and a bottle of decal softener to tidy up the edges by re-adhering them to the car surface.
Air bubbles
I also ended up with a number of air bubbles once the decals had dried. These are relatively simple to sort out. Again using the decal softener and brush you can very gently dab them away. Don't feel tempted to brush them away as this can tear the decal. Any stubborn bubbles can also be pierced with a pin or blade to make a tiny hole allowing any air to escape when dabbed with the softener.
The Nose Decal
The decal on the nose of the model needs some extra care when cutting. It's easier to do this before fitting the front of the body so that the air intake covers can easily be removed.
I took the covers off by pressing them from the underside, removed the double sided tape, then fitted them back onto the body. After applying the decal and leaving it to dry overnight, I carefully cut around the edges using the shape of the covers to guide the blade. When that was done, I slowly removed each cover from the body, again by pressing from underneath. I used decal softener to tidy up the edges again – the bottom of the circle is very thin, so some care was needed to make sure it wasn't damaged.
Once that had dried, I put the covers back into place. Historical photos of the car after the race show the left and right air intake covers were removed. Keeping true to the original race I left those covers off, which I think looks pretty authentic on the finished model!

The Finished Model